How To Make A TRAVEL VIDEO – 12 Tips You Need To Know
Making travel videos is a fantastic way to capture memories and share your adventures with friends and family. With just a smartphone and some basic knowledge, you can create stunning videos that transport viewers to the places you’ve explored.
These tips will help you level up your travel video game, whether you’re a complete beginner or looking to enhance your skills.
1. Plan Your Shots Before Traveling

Research your destination thoroughly before packing your bags. I always make a simple shot list of iconic landmarks, local activities, and unique cultural elements I want to capture. This preparation prevents that awful feeling of returning home and realizing you missed filming something important.
Having a plan doesn’t mean being rigid – some of my best footage came from spontaneous moments. Just keep a mental checklist of those must-have scenes that tell your destination’s story.
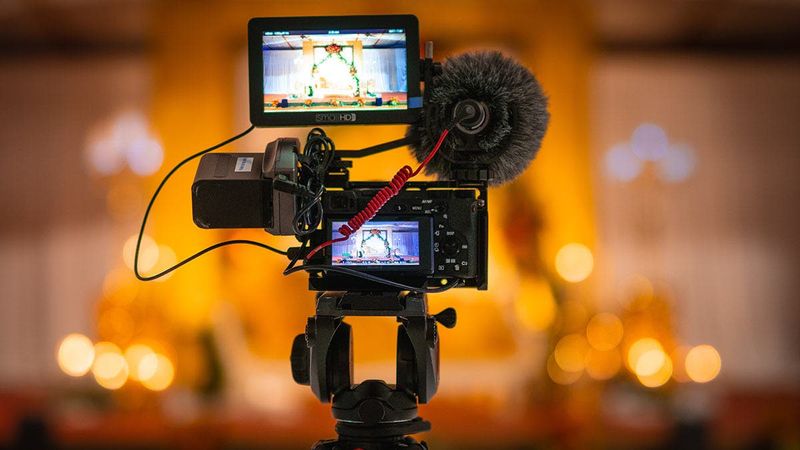
2. Pack Light But Effective Gear
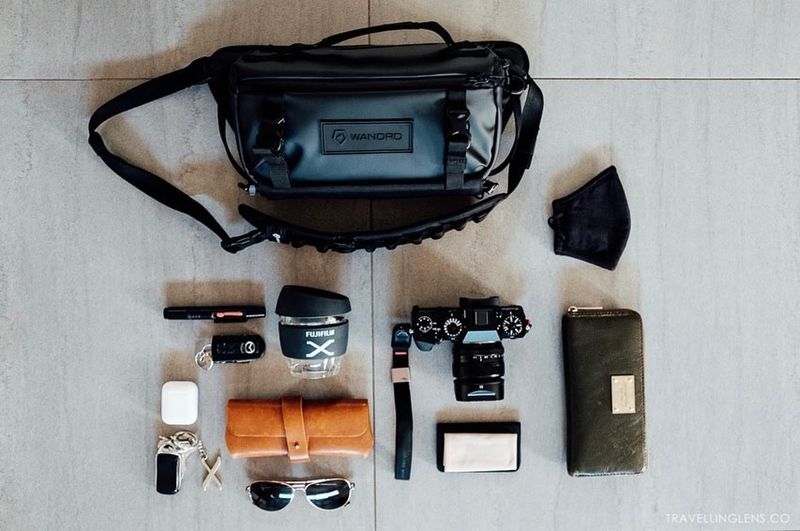
Heavy equipment will exhaust you faster than a marathon in the desert. My go-to travel kit includes just a smartphone or small camera, a compact tripod, a microphone, and spare batteries. This minimalist approach keeps me mobile and ready to capture moments without becoming a walking camera store.
When choosing gear, prioritize versatility over specialization. If something can serve multiple purposes, it earns its spot in my bag. Remember, the best camera is the one you actually have with you when amazing moments happen.
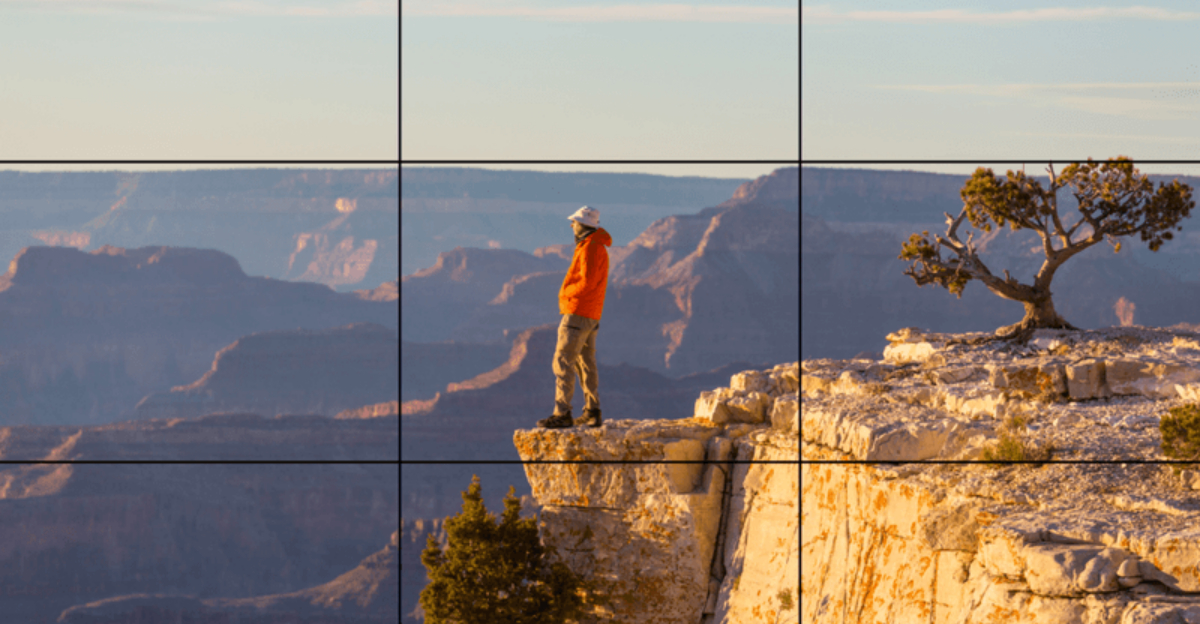
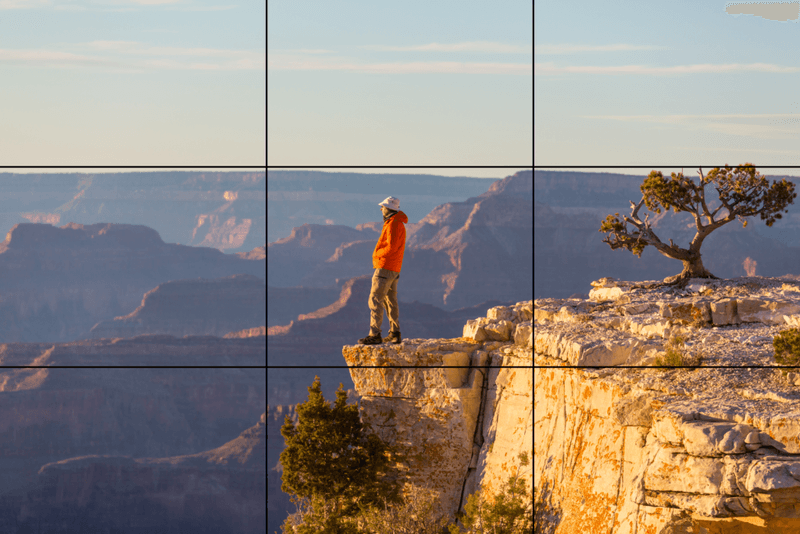
3. Master the Rule of Thirds
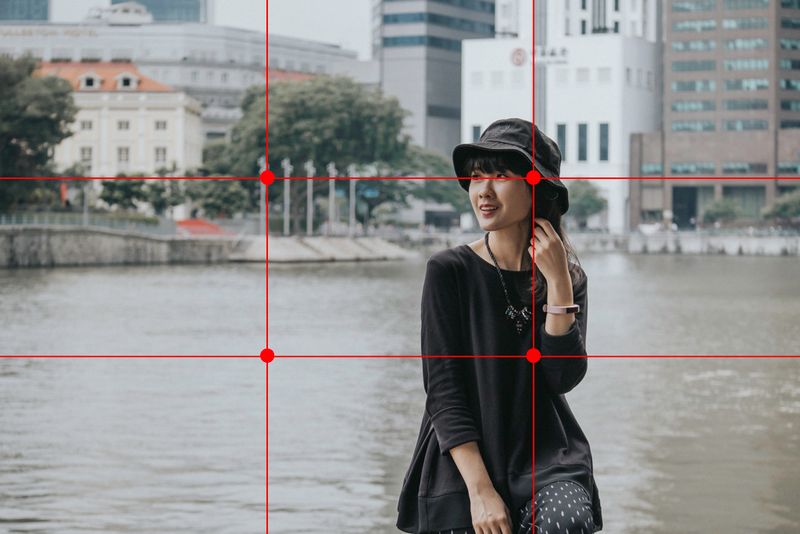
Imagine your screen divided into a tic-tac-toe grid with nine equal sections. Placing your subject along these lines or at their intersections creates more balanced, interesting compositions than centering everything. I’ve transformed ordinary scenes into visually compelling footage just by applying this simple principle.
Most cameras and phones have a grid overlay option you can enable. Turn this on and watch how your composition immediately improves. This tiny adjustment makes your videos look instantly more professional without any fancy equipment.
4. Capture Stable Footage
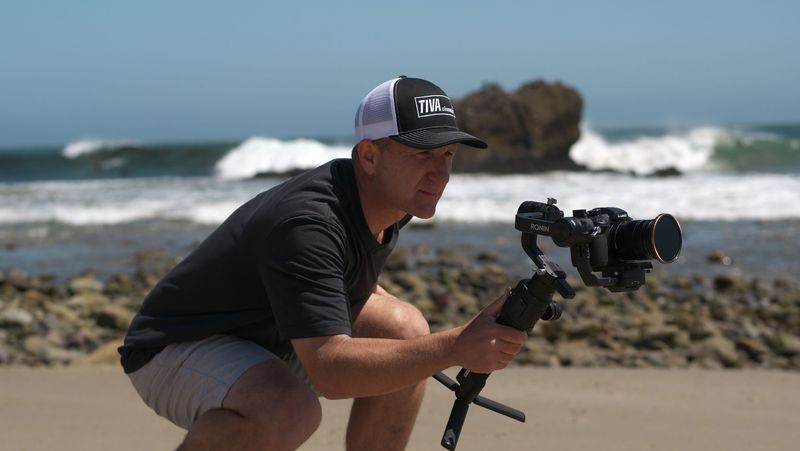
Shaky video can make viewers seasick faster than a storm-tossed fishing boat. When I’m shooting handheld, I keep my elbows tucked against my body, creating a human tripod. For walking shots, I bend my knees slightly and move heel-to-toe for smoother motion.
Did you know your breathing affects stability? Taking slow, controlled breaths while filming makes a noticeable difference. If budget allows, a small gimbal stabilizer can work miracles for moving shots. Even budget-friendly options produce dramatically smoother results than handheld alone.
5. Mix Up Your Shot Types
Variety is the spice of travel videos! I always gather a mix of wide establishing shots, medium shots, and close-up details for each location. This combination gives viewers both context and intimate connections to the places I’m showing.
Wide shots tell viewers where we are. Medium shots show what’s happening. Close-ups reveal the texture and emotion that make places memorable. Switching between these creates visual rhythm and keeps viewers engaged throughout your video.
Try capturing the same subject from multiple distances and angles – you’ll be amazed at how much more interesting your final edit becomes.
6. Embrace Golden Hour Lighting
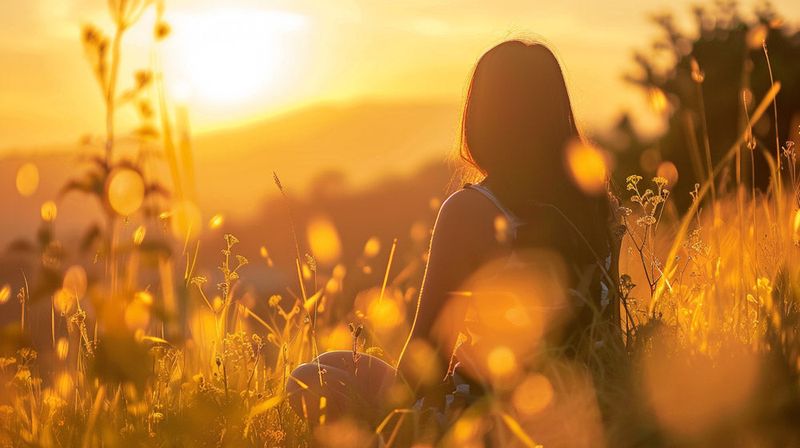
Timing transforms ordinary locations into magical wonderlands. The hour after sunrise and before sunset bathes everything in warm, golden light that makes colors pop and softens harsh shadows. I’ve literally gasped at how beautiful mundane scenes become during these magical windows.
Planning shoots around golden hour requires some effort – sometimes setting alarms for ungodly hours – but the results are absolutely worth it. Even smartphone footage looks cinematic with this natural lighting advantage.
Pro tip: apps like PhotoPills can tell you exactly when golden hour begins at your specific location.
7. Record Quality Audio
Bad sound can ruin otherwise beautiful footage faster than you can say “what was that noise?” When I’m recording narration or interviews, I use a small external microphone that plugs directly into my phone or camera. The difference compared to built-in mics is absolutely stunning.
Capture clean ambient sounds too – market chatter, ocean waves, street musicians. These audio elements bring viewers into your experience more effectively than visuals alone.
If windy conditions are unavoidable, a furry windscreen (deadcat) for your microphone works wonders for reducing those irritating wind noises.
8. Tell a Story With Your Footage
Random pretty shots strung together get boring fast. Instead, I approach each travel video with a simple narrative structure – beginning, middle, and end. Maybe it’s the journey to a destination, a day’s adventure, or the evolution of how I experienced a place.
Show viewers your anticipation, the reality you encountered, and your reflections afterward. Including moments of challenge alongside the highlights creates an authentic story that resonates more deeply.
Genuine human moments – like your reaction to tasting a strange food or getting lost – often become the most memorable parts of travel videos.
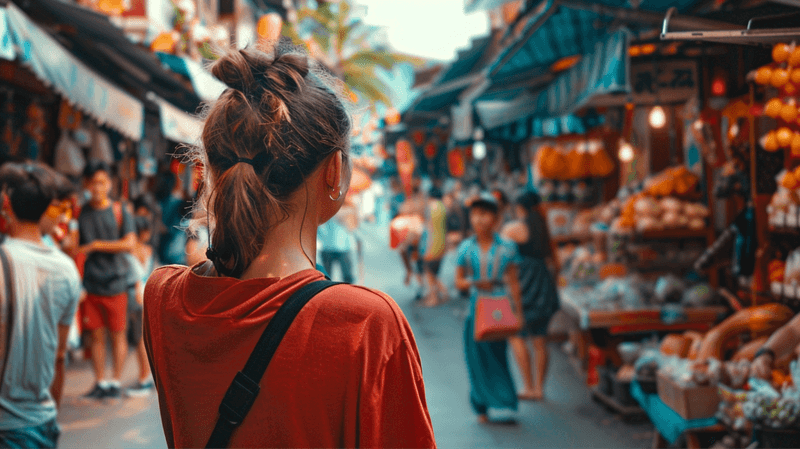
9. Include Human Elements
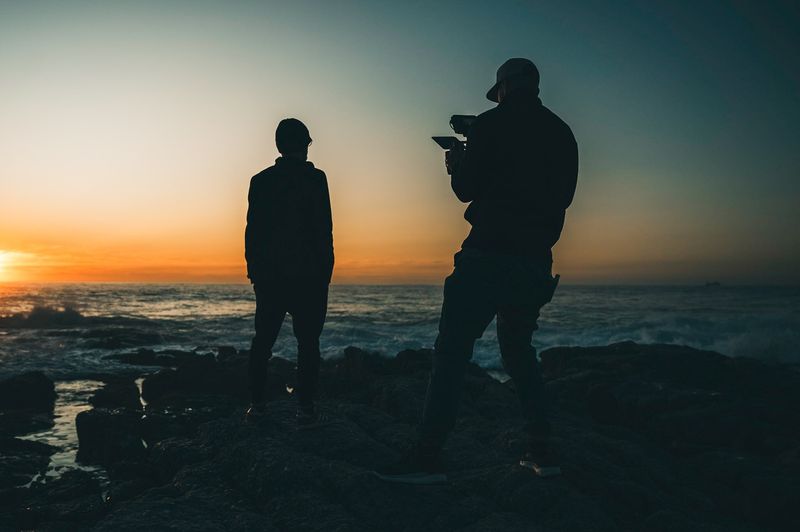
Empty landscapes may be beautiful, but they rarely create emotional connection. Adding people – whether locals going about their day or your travel companions experiencing the location – instantly makes footage more relatable and engaging.
My favorite technique is filming someone discovering a place rather than just the place itself. Their genuine reactions communicate more than a thousand words of narration ever could.
When filming strangers, always be respectful and ask permission when appropriate. A smile and gesture toward your camera usually communicates your request across any language barrier.
10. Create Smooth Transitions
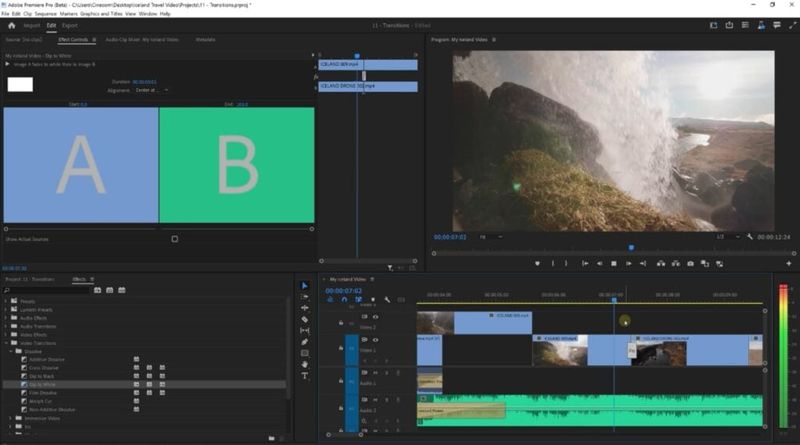
Jarring cuts between scenes can ruin the flow of your travel story. I love using natural movements to transition between shots – panning up to the sky in one location, then down from the sky in another creates a seamless connection between different places.
Objects moving across your frame can also create natural wipes. Try following a passing car or walking person until they fill the frame, then cut to your next scene starting with a similar movement.
Even simple techniques like matching colors or shapes between consecutive clips can create surprisingly professional transitions without fancy effects.
11. Edit to Music With Rhythm
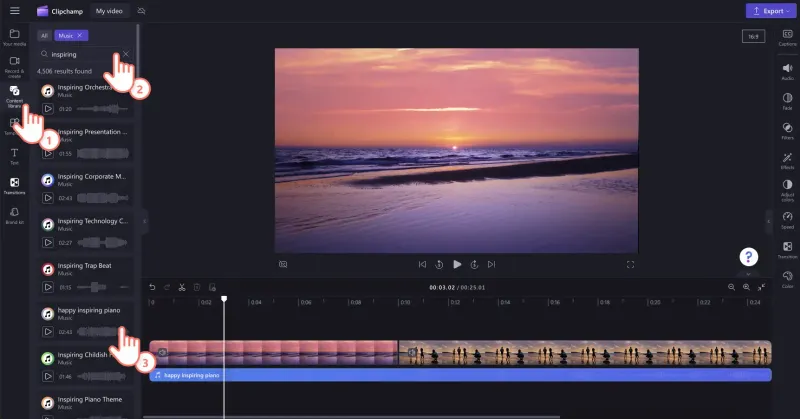
Music transforms collections of clips into emotional experiences. I select my soundtrack first, then cut footage to match its rhythm and mood. Syncing scene changes to beat drops or instrumental shifts creates that professional feel viewers love.
When choosing music, consider the cultural context of your destination. Using regional music can enhance authenticity, though always ensure you have proper licensing rights.
Free resources like YouTube Audio Library offer surprisingly good options for creators on a budget. Remember that music should enhance your story, not overwhelm it – sometimes less is more.
12. Color Grade for Consistent Look
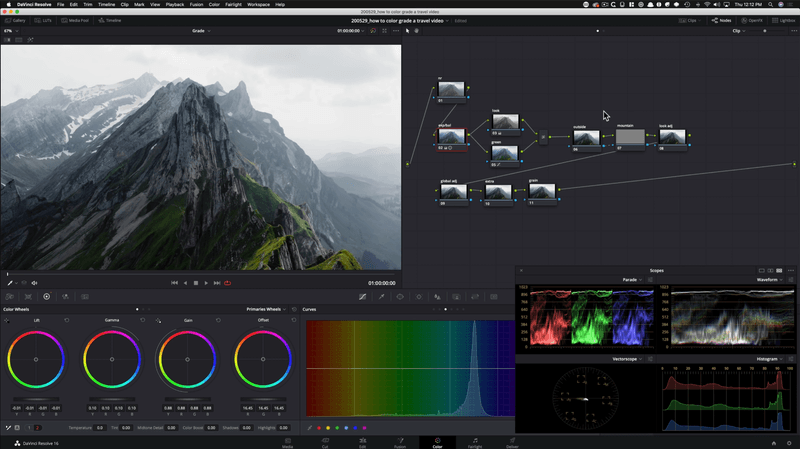
Nothing screams amateur more than wildly different colors between consecutive clips. I create a consistent look by applying similar color adjustments across all footage from the same location. This unified palette ties everything together visually.
Mobile apps like LumaFusion or desktop software like DaVinci Resolve offer powerful color grading tools. Start with basic adjustments to temperature, contrast, and saturation before trying more advanced techniques.
For beginners, using a preset LUT (Look-Up Table) can instantly give your footage a professional color grade with minimal effort – many free options are available online.